


How to Fix Brightness, Contrast and Colors: Video Color Correction Tips
Are you an aspiring video editor? Maybe you just started your career in video production. Maybe you’re a hobbyist who likes to record and edit videos from time to time. Either way, you probably know that color correction is an important part of post-production.
In this article, we’ll teach you how to fix problems with brightness, contrast, and colors in your videos so they look their best. We'll also share some tips on how to color correct videos so they stand out from the crowd of average home movies. Keep reading to find out more!
- • Part 1: What is Video Color Correction
- • Part 2: How to Fix the Brightness in Videos
- • Part 3: How to Fix the Contrast in Videos
- • Part 4: How to Fix the Color in Videos
- • Part 5: Use AVCLabs Video Enhancer AI to Adjust Brightness, Contrast and Colors in Video
- Video Tutorial: Adjust Contrast, Brightness, Saturation and Upscale Video
- • Part 6: Additional Tips for Great Video Color Correction
 Part 1: What is Video Color Correction
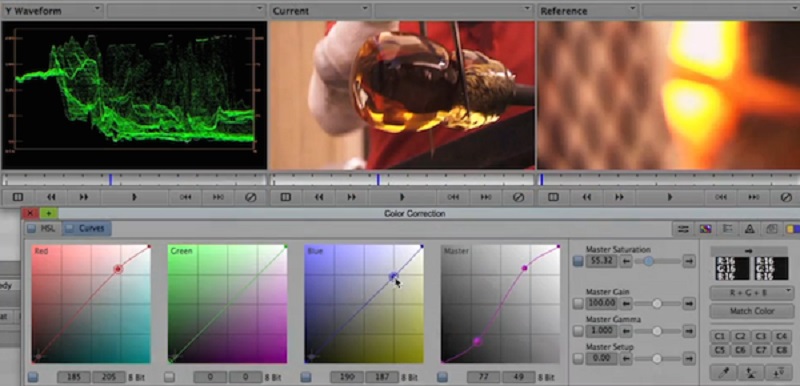
Color correction is the process of adjusting the color aspects of a video. This can include the brightness, contrast, and color of the video. The main goal of color correction is to make the video look as visually appealing as possible. Color correction is important for video editing. Poor color correction can ruin the aesthetics of your video. You can adjust the color aspects of your video to enhance the mood or feel of it. Or, you can do some basic color correction to make your video look better. Video color correction is not the same as color grading. Color grading is a more advanced form of color correction that uses techniques to achieve specific looks. It’s usually applied to films, TV shows, or other types of visual media that need extra aesthetic assistance.
Part 2: How to Fix the Brightness in Videos
This is one of the first parts of color correction that editors learn. However, it’s also one of the most important. If your video is too bright, it will appear too harsh. If it’s too dark, it’s almost impossible to watch. Most videos should be shot in a well-lit room. You can use a lightbox, or a light tent to improve the brightness of your shots. Or, you can use light modifiers on your lights to reduce their brightness and make them softer. If you captured your video indoors, or in a poorly lit room, you can use software to adjust the brightness. The easiest way to do this is with the “brightness” slider in your video editing software. You can also use “levels” or “curves” to adjust the brightness manually.
Part 3: How to Fix the Contrast in Videos
Contrast is the difference between the brightest and darkest parts of a video. You’ll want to fix any problems with the contrast in your video so the visuals look balanced. You can adjust the contrast of your video using the same tools that you use to adjust its brightness. You can also use tools like “levels” or “curves” to adjust the contrast manually. If your video is too dull, you can increase the contrast. If your video is too bright, you can decrease the contrast. Ideally, your video should have a medium level of contrast. You don’t want it to be too bright or too dark.
Part 4: How to Fix the Color in Videos
Color is an important part of your video. There are a few reasons why you might want to adjust the color in your video. Maybe the footage looks a bit washed out, or maybe you want to give it a specific look or mood. Whatever the reason, adjusting the color in your video is relatively easy to do. You can adjust the color of your video to greatly improve its aesthetics. You can use color correction tools to adjust the hue, saturation, and brightness of your video. There are a few different ways to adjust the color in your video. You can use “Curves” or “Filters” to adjust the colors.

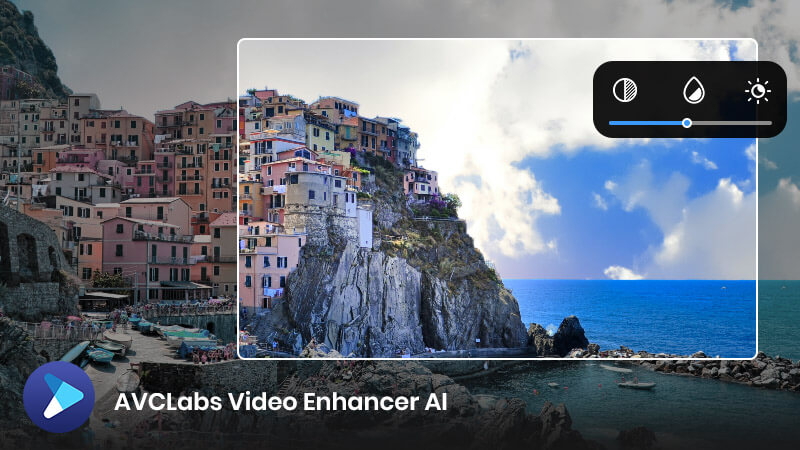
Part 5: Use AVCLabs Video Enhancer AI to Adjust Brightness, Contrast and Colors in Video
There are a few different ways that you can go about fixing the brightness, contrast, and colors in your video. One way is to use video editing tools. There are a number of different video editing tools available, both online and offline. Many of these tools will allow you to adjust the brightness, contrast, and colors in your video. Today we will introduce how to use an AI video editing software, which can not only adjust video brightness, contrast, etc. And it can quickly help you improve video quality.
AVCLabs Video Enhancer AI is such a powerful video upscaling software, you can use it to make your video clearer and optimize video details. And in just a few steps, you can easily adjust the brightness, contrast, etc. of the video to achieve your ideal effect.
AVCLabs Video Enhancer AI
- Adjust video brightness, contrast and colors in just few clicks.
- Enhance the video quality to make them more aesthetically pleasing.
- Deblur your footage by using machine learning.
- Upscale videos from SD to HD, HD to 4K.
- Upscale low-res videos onto a larger screen.
- Trim your footage frame by frame.

Let's follow the tips below to adjust brightness, contrast and colors in videos.
Install and Run AVCLabs Video Enhancer AI
Warm tips: you can click here to check whether your CPU or GPU is capable of clearing a blurry video with AI.
Firstly download the AVCLabs Video Enhancer AI and install it on your Windows PC or Mac, then double-click on the icon to launch it.
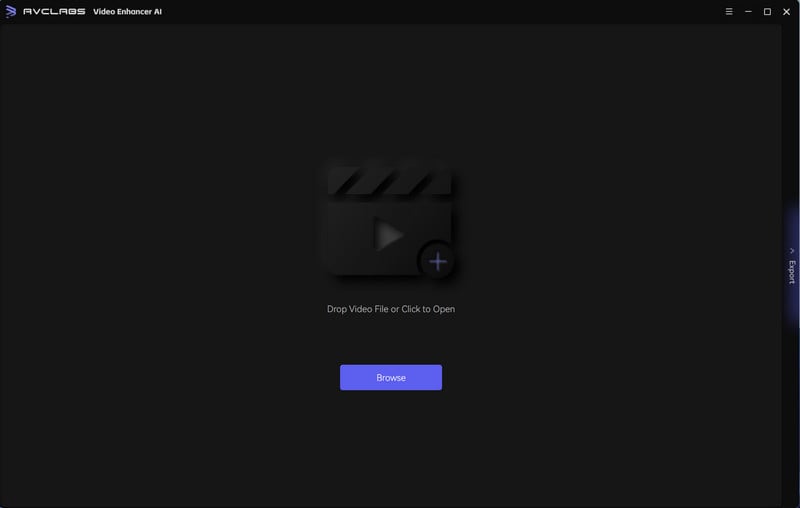
Import the Video to AVCLabs Video Enhancer AI
Click on the Browse button at the bottom of the program interface and upload the video file you need to adjust from the computer.
Select the Processing AI Model and Set the Output Parameters
Before adjust video, you are suggested to modify some critical parameters like processing model, output resolution, output format and output path.
In the upper right corner of the program, you can click on Presets and select Upscale to make the video looks better.
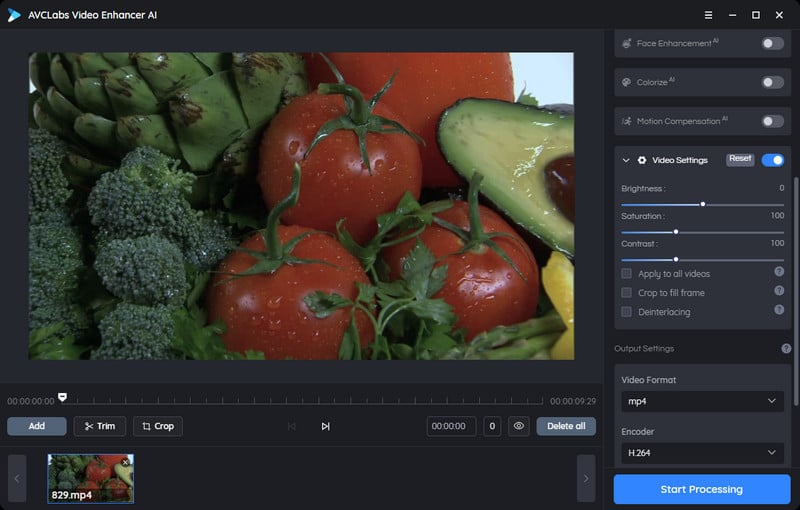
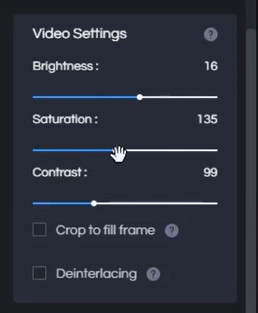
Adjusting brightness, contrast and colors in video
Then go to the bottom and see three white progress bars, where you can adjust the video. Drag the progress bar to adjust brightness, contrast, saturation until you are satisfied with the effect.
Export and save
After all the preparation work is done, simply click on the Export button to start adjust and upscale your video automatically. The final processing time depends on your computer’s system configuration, video size. Please be patient.
Warm tips: You can press the Pause button to pause the conversion if the computer needs to be occupied for other tasks, and resume it when the computer is available.
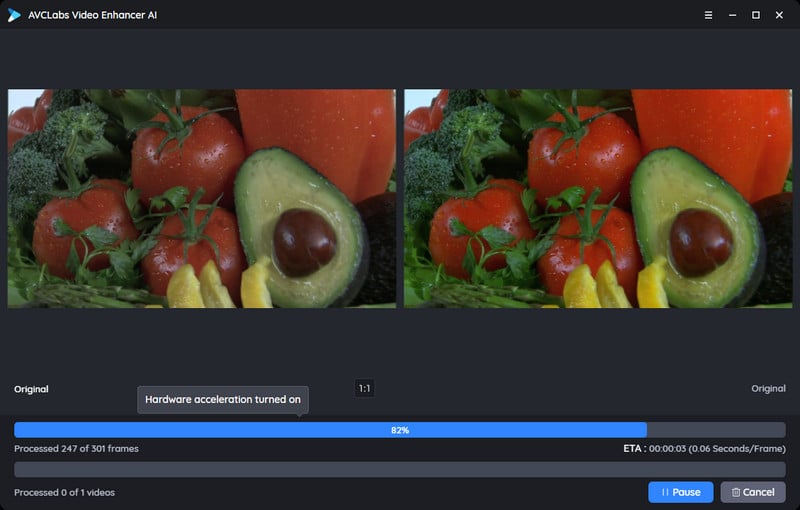
After the process is completed, you can click on the Save button to save it to your PC.
Video Tutorial: Adjust Contrast, Brightness, Saturation and Upscale Video
Part 6: Additional Tips for Great Video Color Correction
There are a few other things you should know about color correction.
First, different colors evoke different emotions and moods. You can use this to your advantage when color correcting your video. For example, red is associated with excitement and passion.
Second, you can use color correction to fix technical issues. For example, if your video is too dark, you can increase the brightness to make it visible. You can also use color correction to fix skin tones.
Third, you can use color correction to draw the viewer’s attention. For example, if you want to highlight something in your video, you can use color correction to draw attention to it. You can also use color correction to draw attention away from things you want to minimize.
Conclusion:
Now that you know what video color correction is and how to fix brightness, contrast, and colors, you can do some basic post-production on your videos. Start by adjusting the brightness, contrast, and colors in your videos. Then, use color correction to boost their aesthetics even further.
Try AVCLabs Video Enhancer AI to breathe new life into your footage!

Related Articles & Tips
- • Top 5 Free Video Enhancer Software to Increase Video Quality Online
- • How to Fix Instagram Story Video Blurry Problem
- • Easily AI Upscale Videos from 1080p to 4K
- • How to Restore Old Videos Automatically and Intelligently Like A Pro
- • Restore Old Home Movies to HD
- • How to Fix Bad Quality Videos
- • How to Remove Noise from Your Footage
- • How to Upscale Videos from HD to 4K
- • Best 10 Video Enhancement Software
 AI Products


Hero Products

Video Converter
- MP4 Converters
- MKV to MP4 Converters
- AVI To MP4 Converters
- MOV to MP4 Converter
- Best Free AV1 Converters
- HEVC/H.265 Converter
- H.264 Video Converter
- Android Video Converter
- Samsung Video Converter
- Sony PS4 Video Converter
- Nokia Video Converter
- MPEG Video Converter
- Convert 4K to 1080P
- Convert MP4 to MP3
- Convert M2TS to MP4
- Convert MVI to MP4
- Convert WebM to MP4
- Convert Videos to MP3
- Convert MP4 to 3GP
- Convert M4V to MP4
DVD Converter
Video Editor
- Best AI Video Editors
- Free AI Video Generators
- Best AI Slideshow Makers
- Replace Face in Video
- AI Cartoon Video Generators
- Text-to-Video AI Generators
- Best Free Voice Changers
- Text-to-Video AI Generators
- Sites to Download Subtitles
- Add Subtitles to Video
- Free Online Video Compressor
- Convert Your Videos to GIFs
- Blur Video Backgrounds
- Video Editing Apps for YouTube
Video Enhancer
- Best 10 Video Enhancer
- Improve Video Quality
- Fix Blurry Videos
- Remove Noise from Footage
- Upscale Video from HD to 4K
- Upscale Video from 480P to 1080P
- Best AI Video Upscaling Tools
- Make a Blurry Video Clear
- Best Old Video Restorer
- How to Sharpen Video
- Fix Bad Quality Videos
- Increase Video Resolution
- Convert Videos to 4K
- Upscale Anime Videos to 4K
Photo Enhancer
- Fix Blurry Pictures Online
- Make Blurrys Picture Clear
- Increase Image Resolution Online
- Remove Blur from Images
- AI Image Sharpener Online
- Topaz Gigapixel AI Alternatives
- Fix Low-resolution Photos
- Colorize Historical Photos
- Remove Noise from Photos
- AI Image Sharpener
- AI Face Retoucher
- AI Image Enlargers
Mobile & PC
