


How to Resize and Crop Videos for YouTube Shorts
With the development of 5G network and the explosion of self-media platforms, the short video era has now been ushered in. Short videos allow people to quickly access information anytime and anywhere, and the access to information has become convenient and efficient. At the same time, the openness of the short video platform also provides a relatively fair stage for the public, making it possible for ordinary people to get a high level of attention. This is why TikTok and YouTube Shorts have attracted numerous people.
Among them, YouTube shorts, a post-launch platform with over 1.5 billion viewers per month, is growing at a rapid pace, as evidenced by its popularity. Whether you are a video creator who wants to attract more traffic or simply want to share something interesting about your daily life, then YouTube shorts is a good platform for you. When you upload a video to your YouTube channel, there are certain parameters that you must follow. If you upload a video that does not meet these specifications, it will not be posted to your channel. Now this article will show you how to resize and crop videos for YouTube Shorts, so you can republish in no time at all.
Part 1: What You Should Know About the Parameters of YouTube Shorts Videos
To create a compliant video for YouTube Shorts, you need to pay special attention to two parameters, namely the length and the aspect ratio of the video. Let's look at the length of the video first. If you are a fan of TikTok or YouTube Shorts, you will find that all videos are very short, which is the characteristic of this type of video. Due to the short time occupied by a single video and the low threshold for users to watch, it helps to improve the utilization rate of fragmented time and meet the needs of the public for fragmented reading. At the same time, people are accustomed to a fast-paced lifestyle, and for most people, it is difficult to settle down to watch long videos. Currently, YouTube Shorts requires videos of no more than 60 seconds to be uploaded. Therefore, if your video exceeds this limit, it needs to be cropped to less than 60 seconds. In a way, it's more of a test for video creators to get a topic across in such a short amount of time and in an engaging way.
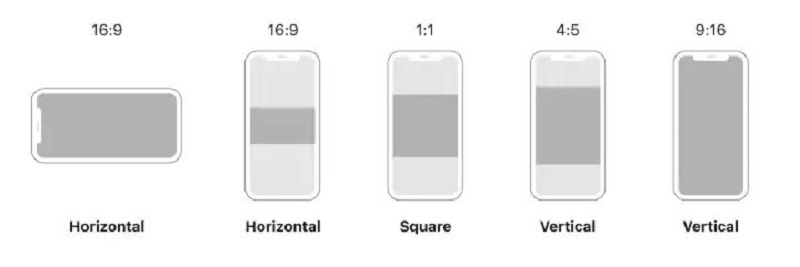
Then let’s move on to the aspect ratio of the video. As mentioned earlier, the characteristics of short videos are to meet the needs of efficiency, convenience, and fragmented reading. To achieve these, in addition to the length of the video, the equipment used to watch the video is also an important point. At present, among various electronic devices, only mobile devices like smartphones or iPad can meet this demand. Therefore, you will see that almost all short videos are vertical videos. This is for the video to be rendered better on the phone. As for the specific aspect ratio, videos uploaded to YouTube Shorts have a ratio of 9:16 and a resolution of 1920 x 1080 as the best, a size that fills the entire phone screen and does not leave a black bar. Of course, 1:1 square videos work too. Square YouTube clips have black vertical bars at the top and bottom of the phone screen, but this also means that your channel name, the video's title and the subscribe button are more visible.
Part 2: How to Resize and Crop Videos with Any Video Converter
Any Video Converter is a free tool that can be used to convert videos and audio files between different formats. It also allows users to rip DVDs and CDs, and download videos from online video sites. Any Video Converter supports a wide range of input and output formats, making it a versatile tool for all your video conversion needs. The highlight part is that, in addition to the features described above, Any Video Converter also has a basic video editor built-in, which allows you to resize and crop your videos for YouTube Shorts.
Any Video Converter
- Convert videos between any formats freely.
- Download videos and music from 100+ sites.
- Burn any video to blank DVD disc to create DVDs.
- Edit video clips with cut, crop, and special effects.
- Support NVIDIA NVENC hardware acceleration.

Steps to Resize and Corp Videos with Any Video Converter
Run Any Video Converter
Download, install and run Any Video Converter.
Basic Settings
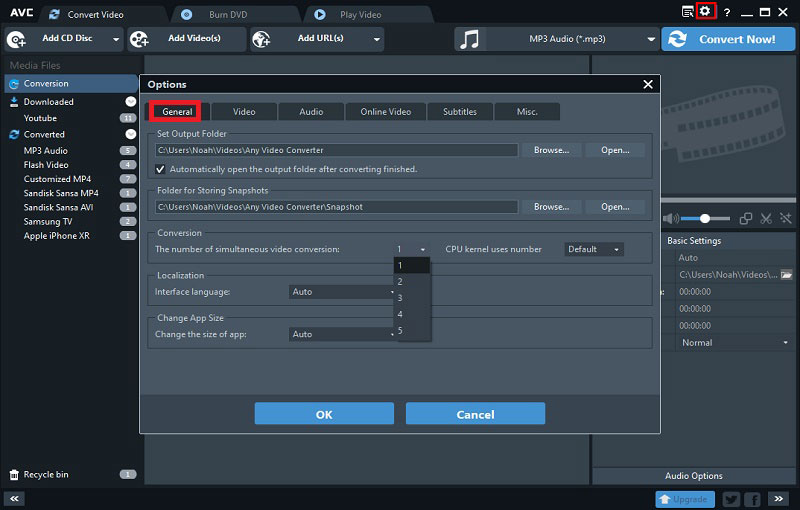
Click the gear-shaped settings button to enter the Options window. Set the output folder in the General section and choose whether to automatically open the output folder after the conversion is finished (it is recommended to check the box to locate the target files directly after the conversion is finished).
Import Video
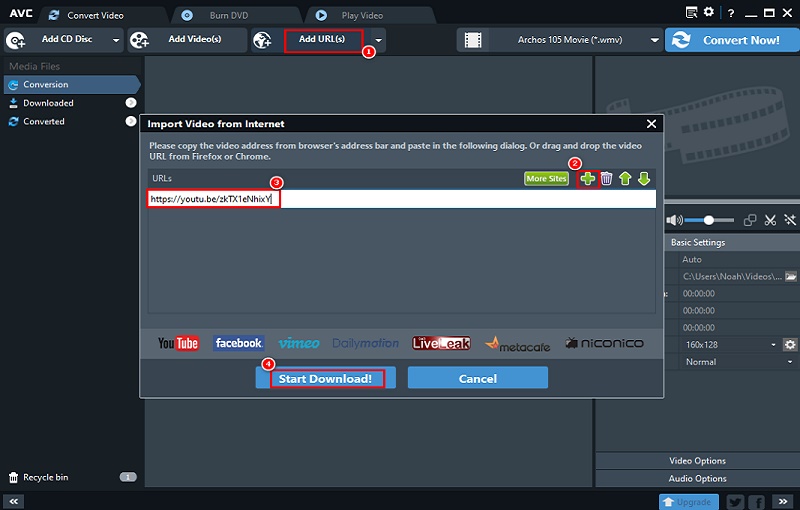
Method 1: Import online videos. If your video is not completely made, and you need to import some material from online platforms such as YouTube, Vimeo or Facebook, you can click Add URL(s) button, copy and paste the target link into the search box, and then click Start Download button to download it.
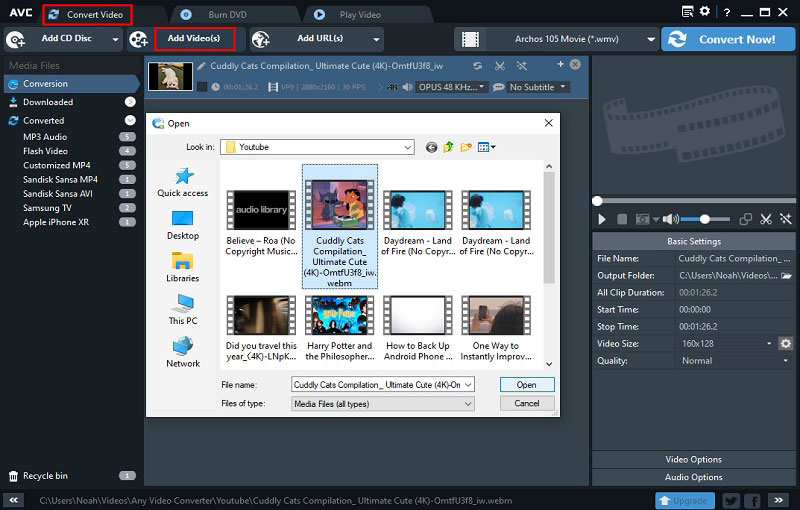
Method 2: Import local videos. Drag and drop the target video directly to add or click Add Video(s) button, locate the target video in the pop-up window, and click Open button to add. Please make sure that the video you upload to YouTube Shorts is vertical.
Edit Videos
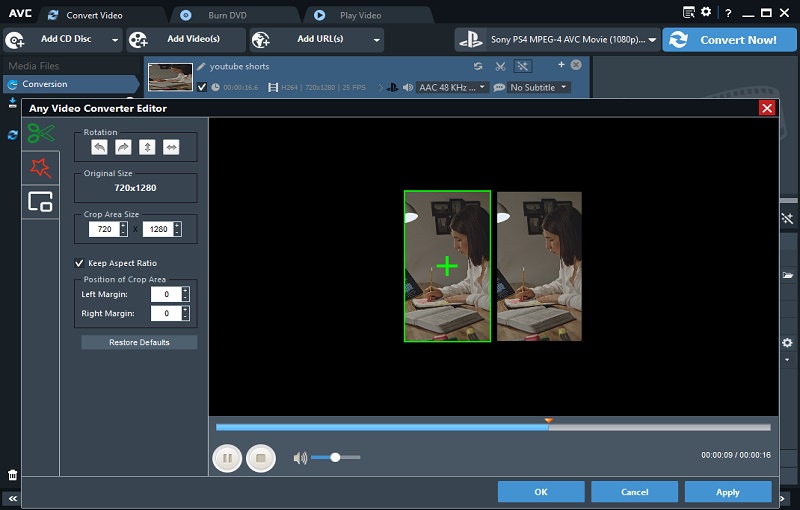
Resize Videos: Click the Add effects ![]() button, you will enter the video editing interface. The left side shows three icons, the green scissors icon represents the Resize function, the red icon represents the Add effects, such as brightness, contrast, saturation, etc., and the last white icon represents the Add text. You need to click the green icon, here the size of this video is 1280 x 720, you can change the size and range of the video by adjusting the value or dragging by clicking the green box in the video. The left video in the interface is the original one, and you can preview the edited video on the right side. Click the Apply button to save the settings, and then continue to add other effects. If you don't need to add other effects, just click OK to apply the size you just set.
button, you will enter the video editing interface. The left side shows three icons, the green scissors icon represents the Resize function, the red icon represents the Add effects, such as brightness, contrast, saturation, etc., and the last white icon represents the Add text. You need to click the green icon, here the size of this video is 1280 x 720, you can change the size and range of the video by adjusting the value or dragging by clicking the green box in the video. The left video in the interface is the original one, and you can preview the edited video on the right side. Click the Apply button to save the settings, and then continue to add other effects. If you don't need to add other effects, just click OK to apply the size you just set.
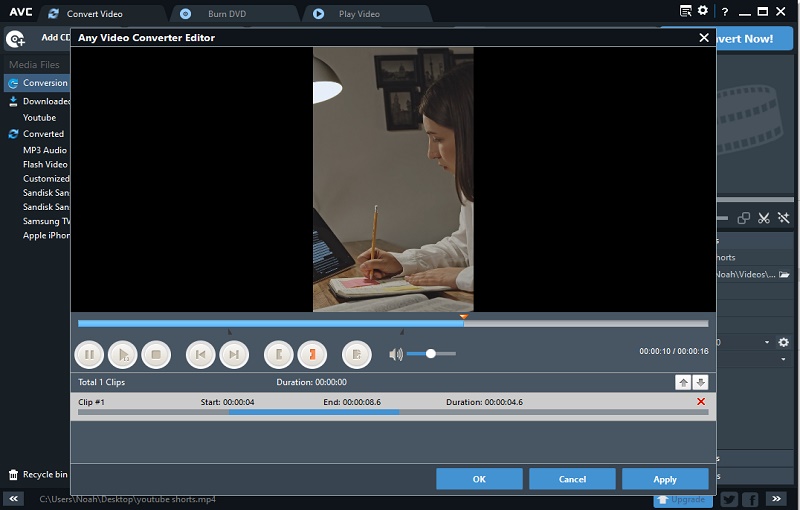
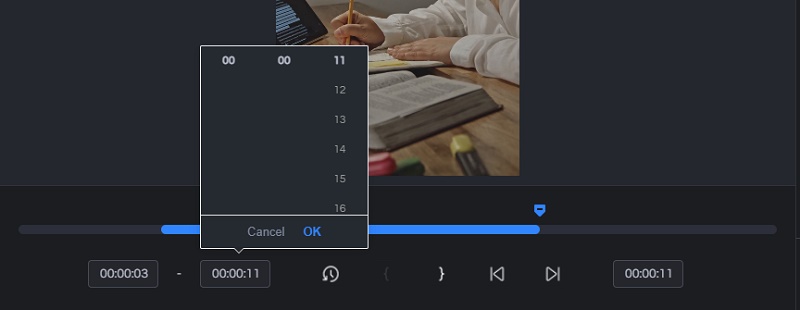
Crop Videos: If your video is longer than 60 seconds, then you need to crop the video to less than 60 seconds. Click ![]() to crop the video. Click on the left brace to set the starting point and the right brace for the ending point. After setting, two black marks will appear on the timeline, and the segment between the two marks is the clipped video. If you want to readjust the starting point, you can also left-click on the black marks and drag them left and right while the video is playing. Click OK after you finish cropping.
to crop the video. Click on the left brace to set the starting point and the right brace for the ending point. After setting, two black marks will appear on the timeline, and the segment between the two marks is the clipped video. If you want to readjust the starting point, you can also left-click on the black marks and drag them left and right while the video is playing. Click OK after you finish cropping.
Export the Video
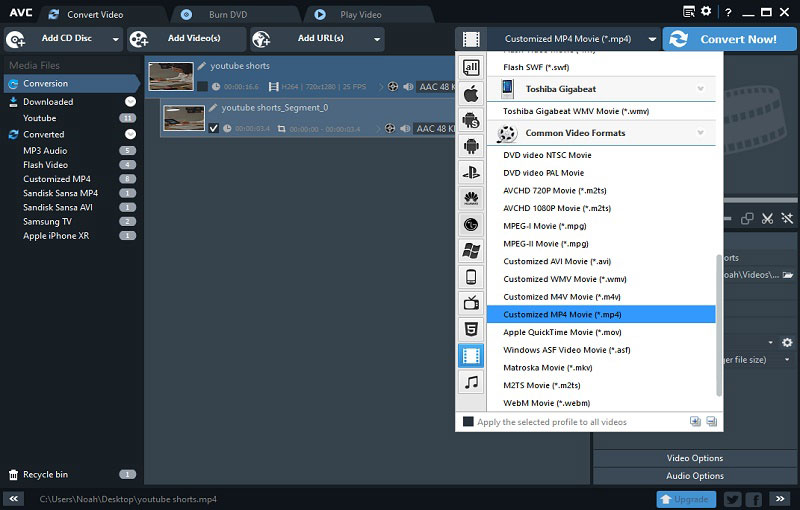
The cropped video will be presented below the original video. Please expand the output profile, then scroll down to "Common Video Formats" and choose the output format. It is suggested to select "Custom MP4 Movie (*.mp4)" as the output format, since this format is available for almost all platforms. Finally, click "Convert Now!" to start the process. Once the conversion is done, the output folder will be automatically popped up. Or you can also find all the converted video history in the customized MP4 section.
In the above steps, it was described in detail how to resize videos. You should note that Any Video Converter can help you resize the video as much as you want without losing any quality. However, if the resolution of your original video is not that high, it can't help you to enhance the quality of the video. Many of the videos shared by people in YouTube shorts are shot with cell phones, and the video quality is hard to be maintained at a high level when the equipment is not professional and the shooting condition is uncertain. For various external reasons, the videos may be shot out of focus and blurred, affecting the video quality, which in turn may affect the traffic of your channel. So, next, to help you produce better quality videos, this article will introduce you a tool that can enhance video quality and solve the problems of out-of-focus and low resolution.
Part 3: A Tool to Help You Enhance the Quality of Your YouTube Shorts Video
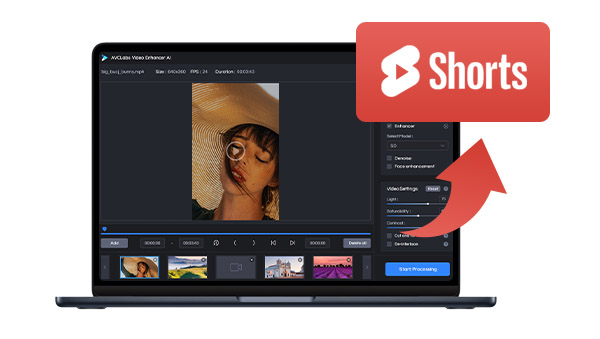
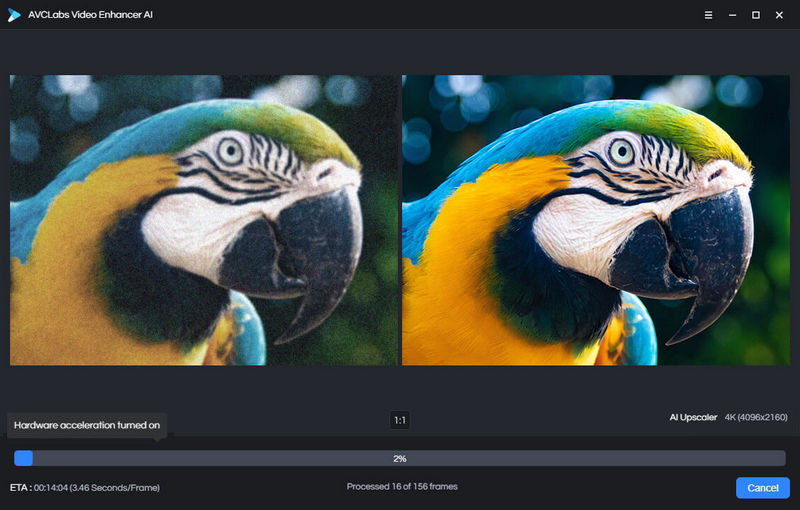
AVCLabs Video Enhancer AI is a tool that can improve the quality of your video. It can solve problems like blurriness, shaky footage, and low resolution. It can also make your video look more polished and professional. AVCLabs Video Enhancer AI is a great tool for anyone who wants to improve the quality of their videos. Whether you're a professional videographer or just someone who wants to make their home movies look better, AVCLabs Video Enhancer AI can help.
AVCLabs Video Enhancer AI
- Convert video to 60, 90 and even 120 FPS.
- Upscale videos from SD to HD, HD to 4K.
- Sharpen faces from blurry video.
- Colorize B&W videos to make revive again.
- Support GPU & TensorRT acceleration.
Steps to Enhance Video Quality with AVCLabs Video Enhancer AI
Run AVCLabs Video Enhancer AI
Download, install and run AVCLabs Video Enhancer AI.
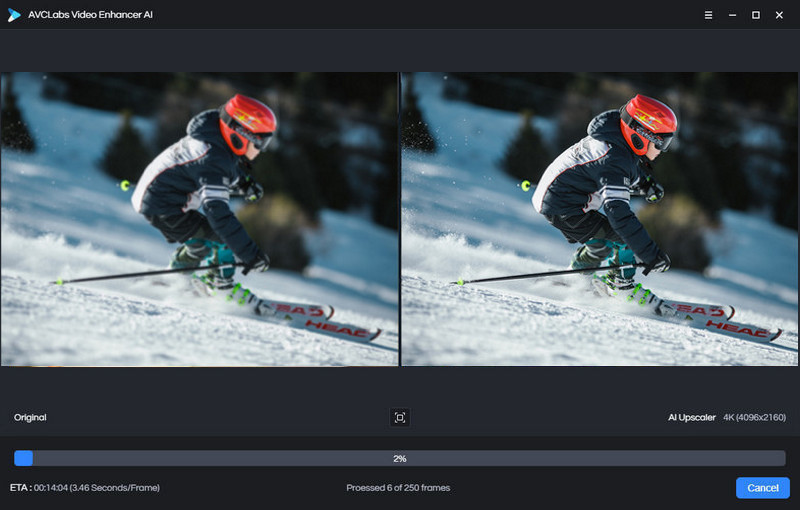
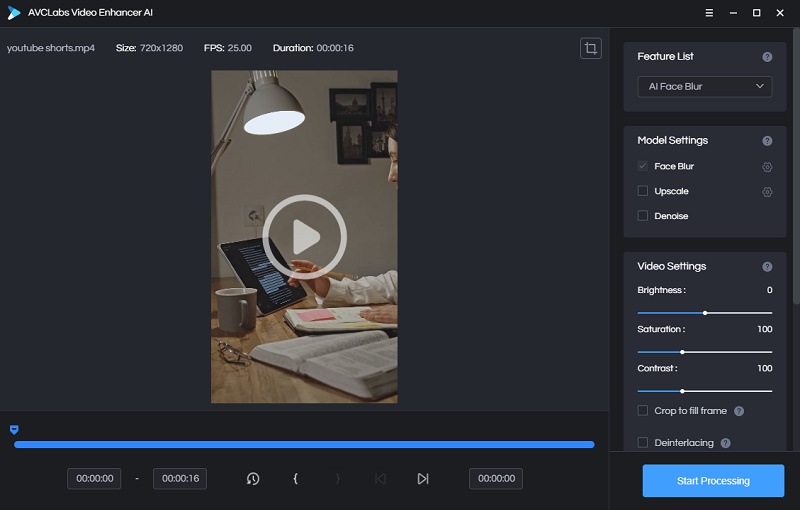
Add Videos
Click the "Browse" button to add the low-quality video you want to enhance, or just drag and drop it.
Select AI model and configure model settings
Currently, the program has two main features, AI Upscaler and AI Face Blur, plus four additional models, namely Upscale, Denoise, Face Refinement and Face Blur.
Upscale: This model is mainly used to improve the quality of low-resolution video, up to 8k. In addition, it provides four options. Click the Settings button next to upscale, you will see the four options Standard, Ultra, Standard(Multi-Frame), Ultra(Multi-Frame). Generally speaking, Standard mode is selected by default, which adopts frame-by-frame processing, with fast processing speed and good quality.
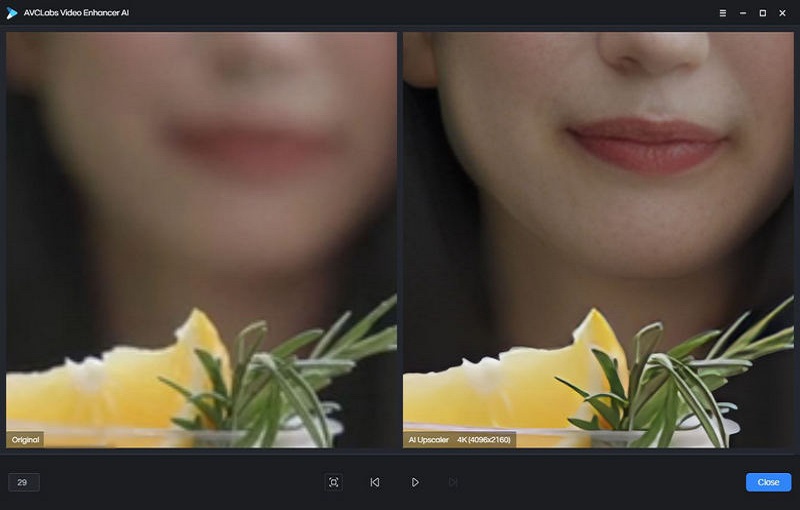
Face Refinement: Only when AI Upscaler is selected, the Face Refinement option will appear in the model settings. The model uses an AI-based super-resolution face enhancement algorithm to obtain face details, sharpen blurred faces, and remove wrinkles and spots, etc.
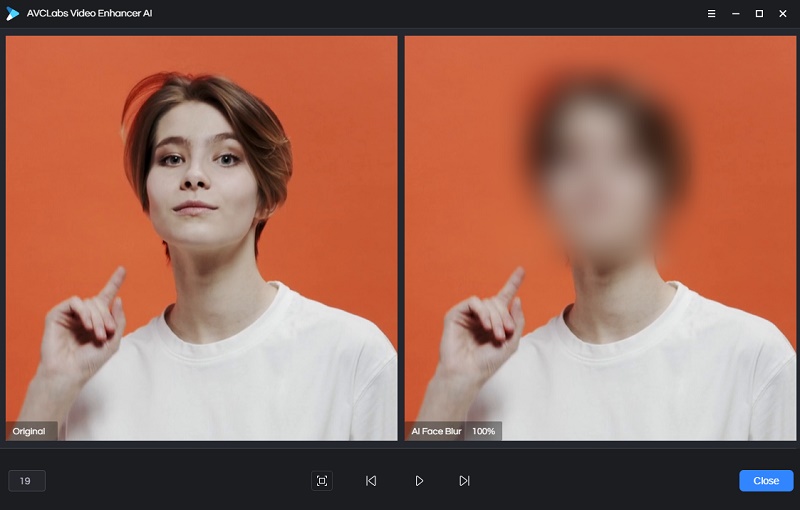
AI Face Blur: Blurring still pictures is easy, but blurring moving videos is a bit difficult. Don't worry, this feature can help you solve this problem very well. If you want to publish a video, but do not want to reveal personal privacy, then choose this model.
Denoise: This model can bring better visual experience by noise reduction to old TV shows, movies, home videos, surveillance videos, etc. and ensure texture quality and detail retention as much as possible.
Set Other Parameters
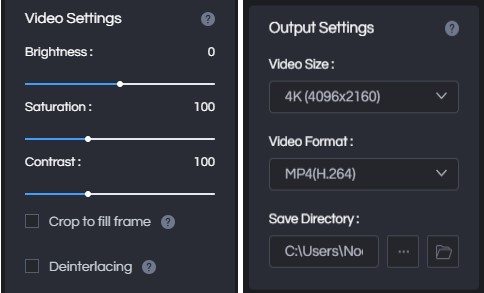
In the Video Settings section you can adjust the video rendering effect, such as brightness saturation, contrast, etc. In the Output Settings section, you can adjust the video size, format and output path.
Preview and Start the Process
After all parameters are set, click the Play button in the middle of the video to preview the effect for 30 seconds, if you are satisfied, you can click Start Processing to start.
If you only need to enhance part of the clip, you can also just capture part of it.
Conclusion
These are the detailed steps on how to resize and crop videos for YouTube Shorts with Any Video Converter, which not only can do this, but also has a wide range of convertible formats that allow you to convert videos to fit any device and platform. Good video quality may attract more viewers for your videos, so if you are struggling with old videos that are out of focus, low resolution and full of noise, then try AVCLabs Video Enhancer AI. Even if you don't know that much about video editing, you just need to add the video, choose the model, and the AI algorithm will do all the rest for you.

Related Articles & Tips
- • Best Free 4K Video Downloader: How to Download Videos from Online Sites to 4K
- • 7 Best YouTube to MP4 Converters for Windows/Mac/Online
- • How to Convert WEBM to MP4 for Free
- • 5 Best Safe Sites to Free Download YouTube to MP3
- • How to Convert Video to GIF Now!
- • Free MP4 to GIF Converters: How to Convert MP4 Files to Attractive Animated GIFs
- • 10 Best Free YouTube to MP3 Converters: How to Download YouTube Videos to MP3 Files
- • How to Resize Video for Instagram, TikTok, Facebook, YouTube Free
- • How to Convert Horizontal Video to Vertical for TikTok, Instagram, YouTube Shorts
- • How to Convert Videos to MP4 Online for Free
- • Top 3 YouTube to MP3 Downloaders
- • How to Resize Video for Facebook Free
- • How to Convert Video to GIF Online for Free
- • How to Download YouTube Videos to MKV Format
- • How to Easily Convert MP4 Files into Stunning Animated GIFs
- • Video Aspect Ratio Changer: How to Change Video Aspect Ratio
- • 4K Video Converter | How to Convert Videos to 4K for Free
- • How to Convert MOV to MP4 Effortlessly
- • 6 Ways to Convert Video to Audio File for Free
- • How to Resize MP4 Video for Instagram
 Highly Recommended

AVCLabs Video Enhancer AI
AVCLabs Video Enhancer AI is an AI-based video enhancement software to upscale video from 480p to 1080p, 1080p to 4K, and up to 8K. With AVCLabs Video Enhancer AI, you can upscale low-res videos to high resolution and bring your old videos a stunningly new look.
Read More